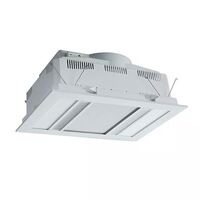
Martec Phoenix 3-in-1 Fan, Heater, Light & Exhaust White
Model # MBHP1000W
Model #
MBHP1000W
$324.50 $295.00 ex GST
Download the MJS App today and get everything you need at your fingertips


Need Help?

Martec Phoenix 3-in-1 Fan, Heater, Light & Exhaust White
Model # MBHP1000W
Model #
MBHP1000W
$324.50 $295.00 ex GST
IDEAL Spliceline 2-Port Inline Connector (100 Jar)
Model # 30-1142J
Model #
30-1142J
$38.50 $35.00 ex GST
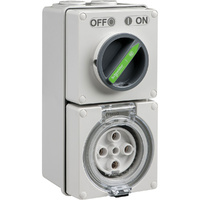
Clipsal Easy56 Round 5 Pin 32A Switched Socket
Model # EY56C532
Model #
EY56C532
$134.50 $122.27 ex GST
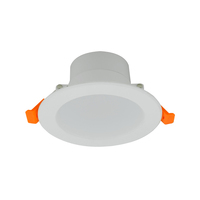
Tradelike BUDDY 10W Non-Dimmable LED Downlight Kit 4000K
Model # TLBU4010W
Model #
TLBU4010W
$4.95 $4.50 ex GST

Clipsal Wiser Smart Smoke Alarm with 10 Year Lithium Battery White
Model # CLP599WSAL
Model #
CLP599WSAL
$152.90 $139.00 ex GST
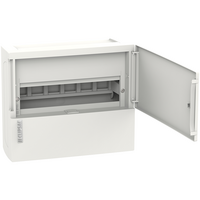
Clipsal Resi MAX 1 Row 12 Pole Surface Mount Switchboard
Model # RMXE112S
Model #
RMXE112S
$46.20 $42.00 ex GST
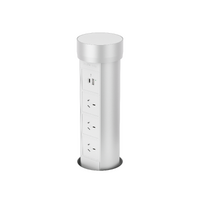
Point Pod Multi Pop Up Powerpoint 3 x Power 2 x USB Silver
Model # PPM01
Model #
PPM01
$490.50 $445.91 ex GST
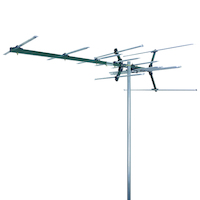
Matchmaster 03MM-DC21V Digital TV Antenna
Model # 03MM-DC21V
Model #
03MM-DC21V
$137.50 $125.00 ex GST
 Click here to see our huge range
Author: MJS Electrical Date Posted:17 July 2020

Let’s admit it. Everyone wants a little bit of drama and opulence in their lives in one form or another. Some people choose to show it through their lifestyle choices, while some choose to show it on the less extra side of things like through the way they design the interiors of their house or even just by designing their outdoor lighting.
There is nothing wrong In wanting to make your landscape look beautiful and inviting. It is a very integral part of your home, after all. There is so much you can do that could help you create your dream front and backyard. You can plant trees and flowers. You can even start an herb and vegetable garden. You can also put a fountain, a patio, and all other things you can think of in making your outdoor space the way you want it to be.
But what is the point in doing all of that when you can only show them in daylight? Why would you let all of your hard work go to waste as soon as nightfall comes? As simple as adding outdoor lighting, you can enhance and transform your property, making it look multidimensional and alive that you can enjoy even at night.
There are a couple of reasons why you should design your outdoor lighting, and it is not just about the aesthetic it gives off and enhances. It also offers functionalities that one can get from it.
Security
One of the many things that people often overlook when it comes to outdoor lighting is its function as additional security for your home. A well-lit garage and surroundings help increase security and safety, making it difficult for unwanted visitors to intrude, especially at night.
No one wants to come home and discover that they have been burglarized, and that is what outdoor lighting helps with. It helps make it a safe place, but it is also a great way to welcome you as you go home at night.
Safety
Have you ever gone down a pathway or a driveway so dark that walking on them was not just scary but also downright an accident waiting to happen -more so if you are driving? Well, having a well-lit pathway or driveway increases safety that could help prevent a trip down to the hospital.
It will help guide not just you but your guests as well through the right path to take; to be able to see clearly if you have steps leading to your door or where to park cars properly; and also, to simply help navigate their way through your property.
Appeal
Of course, even as we discuss the functions of outdoor lighting, we simply cannot ignore the fact that they just ultimately make our spaces beautiful. It creates an ambiance that could transport you completely into another place, making you feel comfortable if you are someplace else. And we can’t forget the allure and drama it brings in.
Just think of it this way:
We can all look at outdoor lighting as if it is the icing on the cake. It just doesn’t make the cake look beautiful, but it is also yummy and filling as hell.
Designing outdoor lighting can be quite an intimidating project, particularly if you plan to do it yourself. A great general rule to follow is that less is more -just like many things in life.
You might be tempted to light everything up in your outdoor space, as this is your work of art. But one thing we can tell you is that you are going to be receiving a costly electric bill monthly, and you are also going to wash the space out.
Here we list five easy steps that could help you design your outdoor lighting not just to make your outdoor space beautiful but also functional.
Go around your outdoor space both in the daytime and nighttime to get a feel of the place. This will help you identify which features you would want to highlight during the night.
To give you an example of what they might be: it could be a big old oak tree standing proud in the middle of your backyard, or a small pond at the end. It could be a wall decorated with overgrown vines and even a water fixture you have added. These things (and more) could be the main visual features you might consider highlighting. And as soon as you have defined them, you can then move on to selecting areas that are more obvious like pathways, driveways, decks, and even your garage.
It is best to sketch it once you have formed an idea of what you want to achieve. Draw your outdoor space, including all the main features you want to highlight and everything that can be noticeable. In this way, it will be easier for you to map out where to add other lighting fixtures.
It is well to take note to be as precise as you can be. And also include previous lighting fixtures you may have already. This will help you figure out which lighting system to choose from.
It is essential to select the right lighting fixtures for each designated area you identified in the previous step. To help you quickly decide on this, you can start by knowing if you have an existing lighting system.
It is well to consider this as most outdoor lighting that you can find today is low voltage and with good reason. Unlike 240 volt systems, it is safer to work with and less costly to install. And though low-voltage lights receive one-tenth of the power, thanks to a step-down transformer, there is no limit to the effects they can achieve. It is only recommended to use a 240 volt system if existing infrastructure is already in place. But if there is none, a 12V or 24V low voltage exterior lighting system with a transformer is the way to go.
Typically, as a rule of thumb to follow, place lighting fixtures 1.8 to 2.4 meters apart. But honestly, spacing outdoor lighting can be subjective.
For pathways, it would be best to follow the 1.8 to 2.4 meters spacing. But do not be afraid to space them closer, especially if you want to achieve a more vivid effect.
For accent lights, it depends on whether the fixture you want to light up is small or big. So it might be useful to buy more than what you think you need. You can always adjust it once you start plotting them.
For highlighting feature walls, it is always suggested to place these lights 30cm to 60cm away from it. This is to cast even lighting. Then follow the 1.8 to 2.4 meters spacing rule to spread them out.
Spacing might be subjective, but always remember not to put too much light. Consider the effect you want to bring out and work from there.
The final step is bringing your design to real life. Whether you choose a 240V, 12V or 24V lighting system, make sure you have enough power to supply the lights you will be placing. If you decide to use a low voltage system, you will likely only need one transformer to supply all of your wire runs. Just make sure that you select the proper transformer size with a maximum wattage capacity ranging from 105 to 400 watts. And also, long enough wires and cables to reach all of those areas. Unlike HDMI cables that are easy to install, these wires may need more work.
Keep in mind all of the changes and expansion that might happen or plan on doing with your outdoor space. So it is always recommended to get a more significant power supply than what you initially thought. In this way, you would not need to change your existing one when that time comes.
There are a few basic lighting types that you need to familiarize yourself with:
Spotlights
These are adjustable lighting fixtures that could precisely illuminate a feature of your outdoor space like architectural details or landscape features. They also create a dramatic effect once you look at the overall scene.
Floodlights or Wall Wash
These are great for visibility and security as they have a full spread. You can put it in vast areas like a driveway, or any surface like facades or fences.
Inground Lighting
As the name suggests, these lighting fixtures are generally placed on the ground. They are mostly used to light pathways and driveways, but they can also be set as an accent light to create drama at a particular outdoor feature like a tree or a structure.
Path Lights
If there is anything your outdoor area should have, it is path lights. They are the ones that illuminate walkways and driveways, but they also help you and your guests safely.
Submersible Lights
These lighting fixtures are perfect for any water feature like a pond or a pool. It is similar to a spotlight but emerges underwater to create that dramatic effect. And of course, to help you see if you are about to fall.
Hardscape Lights
These are lighting fixtures you can install into or onto structural features like a wall, outdoor kitchen counters, and columns.
Indicator Lights
They are used to highlight areas like a patio, a deck, or specific pathways like a vegetable garden.
Most of the light bulbs used nowadays are LED because of its energy-saving and long-lasting qualities. And for outdoor lighting fixtures, they are perfect as they can withstand all kinds of weather.
Standard incandescent bulbs and halogen floodlight bulbs can also be used outdoors as long as they are not directly exposed to rain and other elements. But the best way to check if a lightbulb or light fitting can be utilized outdoors is to check the Ingress Protection or IP Rating and the manufacturers recommendation of installation area.
If you are still unsure, you can ask your electrical wholesalers to help you and guide you through.
With all of these said, here in MJS Electrical Supplies Sydney, it is essential for us to give our customers the best electrical supplies and products they might need with an unbeatable price. We make sure that as your electrical wholesaler, our products are not only in the best quality and are guaranteed to last, but most importantly, they can be easily installed as well.
Sourced from both Australian -brands like Clipsal, etc.- and overseas suppliers, we can assure you that we have some of the best outdoor lightings you can use to achieve that outdoor space of your dreams.
Some of our best and most popular outdoor lightings you can buy are:
10W LED FLOOD LIGHT (DAYLIGHT) IP65 WEATHERPROOF
With its aluminum casing that gives a better heat dissipation performance, this outdoor lighting is perfect for the outdoors because of its durability, stability, and reliability. You can use this indoors too. With its widespread beam, it can surely light up your garden just the way you want to.
MARTEC FORTRESS II 30W TRICOLOUR LED DOUBLE EXTERIOR SECURITY LIGHT WHITE
The Fortress II Double Exterior’s adjustable arms make this particular product exceptional. Not only does it illuminate your outdoor space, but it also perfects to use as additional security for your home. It is quick and easy to install. Plus, it will save you on energy costs.
This surface mounted wall light is a favorite of many. With its sleek and minimal design and clear tempered glass cover, this outdoor lighting will provide you with excellent illumination and also add as an accent to the overall design of your exteriors. It comes in 3 available colors: stainless steel, white and black, so you know you can match it with whatever style you want.
BRILLIANT ESSEX LED OVAL LOUVERED BUNKER LIGHT
Made with durable die-casting aluminum construction, this traditional oval bunker light can withstand even the harshest weather. It has a semi frosted glass pattern cover that diffuses the light giving your outdoor space a more dramatic atmosphere.
3A 30W/40W DUAL POWER TRI-COLOUR DIMMABLE LED DOWNLIGHT KIT
This LED downlight kit is perfect for retail shops, cafes, and other commercial spaces where high light output is required. It is dimmable with a trailing edge and a universal dimmer, enabling you to create different atmospheres.
Aside from choosing the best outdoor lighting that best fit your overall plans, there are other things that you can keep in mind and try:
Up Lifting
It is when you aim your lights upwards to create that highly dramatic effect. Sometimes these lights can be buried on the ground. Use this technique to focus on features like trees, a statue, or even textured walls.
Grazing
This is a great option to use if you have hardscapes in your outdoor place. The idea is to place lights close to the surface and aim it upwards or downwards, depending on the drama you want to achieve. But the primary purpose is to highlight and to play on with the different textures. Some people even use LED strip lights to graze.
Shadowing
Shadowing is when you put a light in front and below the object creating interesting shadows. This best works if there is a wall behind the feature to show off the shadows.
Silhouetting
Silhouetting is the opposite of shadowing wherein you conceal the light behind and below the object.
Moon Lighting
By using soft lights placed high up in the tree, you can create an impressive effect of moonlight filtering through its branches and leaves.
Washing
Typically uses wide-beamed lighting, washing is used to illuminate a vast space area. This is to help create a well-lit space.
Cross Lighting
Cross lighting is used to illuminate objects like trees and statues to reveal a more 3-dimensional form from every angle.
In addition to these different techniques, it is also good to remember to be careful with the different color temperatures of your lights. A simple guide to follow: the best outdoor lighting for your landscape should be in the same color as the object you are illuminating.
Now, designing your outdoor lighting seems like hard work because it is. But the output will genuinely be rewarding and satisfying in the end. However, if you do not want to lift a finger, you can always hire a professional.
However, just like any piece of art, if you truly want to make it personal and a reflection of who you or your family are, it is best to do it yourself. Be creative and have fun!

Copyright © 2026 MJS Electrical Products & Supplies. All rights reserved


Add your favourites to cart

Select Afterpay at checkout

Log into or create your Afterpay account, with instant approval decision

Your purchase will be split into 4 payments, payable every 2 weeks
All you need to apply is to have a debit or credit card, to be over 18 years of age, and to be a resident of country offering Afterpay
Late fees and additional eligibility criteria apply. The first payment may be due at the time of purchase
For complete terms visit afterpay.com/terms
